Showing posts with label YouTube Video. Show all posts

Sunday, 18 June 2017

Timeless Card - The Robin's Nest

Hello,
Just to let you know this is my last project for The Robin's Nest Design Team.  It has been a fantastic experience to work with such wonderful & diverse range of products.  I just adore Dew Drops and can rarely complete a project without including them somewhere.  Here is a little peek of my layered vintage card.
To purchase the supplies for this project please visit The Robin's Nest.

For more inspiring paper-craft projects from the Design Team, be sure to visit us at
The Chattering Robin's Blog and follow us on Facebook.

Thanks for visiting!

Sunday, 21 May 2017

Vellum Wedding Layout Video - The Robin's Nest

If you are looking for some scrapbooking ideas for an upcoming wedding, you won't want to miss my tutorial featuring delicate glitter vellum, lovely lavendar glitter cardstock, and beautiful white pearl dew drops.
You can see the complete step by step video HERE.

Robin's Nest Supplies:
Iridescent Classic Glitter Swirl Vellum, Wineberry Glitter Cardstock, Black & White Clock Cardstock, Iridescent Glitter Cardstock, Black Glitter Journal Tags, Doilie Die Cuts, Silver Straw, White Pearl Dew Drops, Dew Dew Glue

Other Supplies: 3 photos, white cardstock, vine die, script love die, die cutting machine, small roses

To purchase these supplies, visit The Robin's Nest.
For more inspiring paper-craft projects from the Design Team, be sure to visit us at The Chattering Robin's Blog and follow us on Facebook.

Thanks for visiting!

Sunday, 16 April 2017

Wedding Favor Gift Box Video - The Robin's Nest

Hello Girls,
Friendship Wraps are cute chipboard containers exclusive to The Robin's Nest. They are perfect as wedding favors or to hold any small gift. They come flat in solid colors for you to decorate, personalize in your own style, and assemble. I chose an aqua box to embellish as a wedding favor or bridal party gift. The thick chipboard is sturdy and easy to decorate and the containers are simple to assemble.
You can find the step by step video to make this favor box HERE.

I think once you decorate one, you will be eager to try all the different styles. Friendship Wraps are perfect to have in your stash for that last minute thank you gift that you can customize for the recipient. Even when all you have time to do is buy a gift card, the packaging can still be fabulous!

Robin's Nest Supplies: Tower Teal Friendship Wrap, Iridescent Classic Glitter Swirl Vellum, Azure Ribbon, Wedding Die Cuts, Azure Flower Die Cuts, Silver Bells Dew Drops, Hearts Dew Drops

Other Supplies:
VersaMark Watermark Ink Pad (Tsukineko), Silver Embossing Powder (Stampendous), Heat Gun (Ranger), Thank You Stamp (Fun Stamps Ltd), white cardstock, leaf border die, liquid adhesive, dimensional foam tape

To purchase these cute favor boxes and embellishments, visit The Robin's Nest.

For more inspiring paper-craft projects from the Design Team, be sure to visit us at The Chattering Robin's Blog and follow us on Facebook.

Thanks for visiting!

Sunday, 19 March 2017

Vellum Wedding Card Video - The Robin's Nest

Today I'm sharing an elegant wedding card using The Robin's Nest Glitter Swirl Vellum and lovely pearl white Dew Drops. This design is also perfect to celebrate anniversaries. I have made a short instructional video to guide you through the steps.
You can see the video HERE.

The Robin's Nest Supplies:

Iridescent Classic Glitter Swirl Vellum, White Pearl Dew Drops, Dew Dew Glue
Other Supplies: white cardstock, cardbase 6x6", vine edge die, script love die, die cutting machine, Silver Paper Foil (Rinea)

To purchase the beautiful vellum for this card, visit The Robin's Nest.
For more inspiring paper-craft projects from the Design Team, be sure to visit us at The Chattering Robin's Blog and follow us on Facebook.

Thanks for visiting!

Thursday, 23 February 2017

Rinea Foil Scrapbooking Title


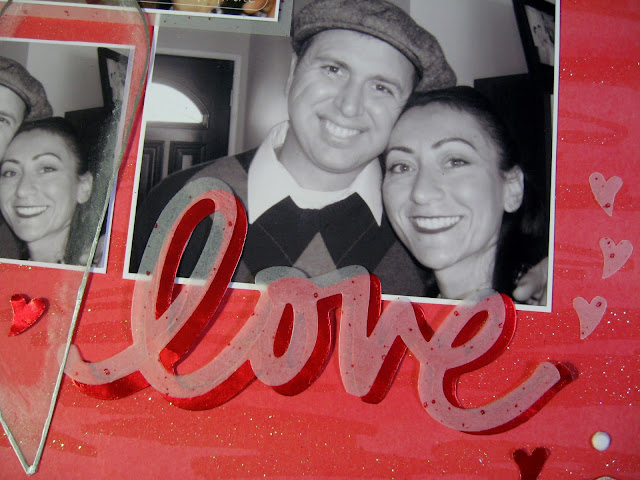
Check out my YouTube Video of a quick & easy Valentine's Day layout.  All you need are four photos and bit of vellum, transparency, and Ruby Foil to make this project so unique. Rinea paper foils die cut beautifully.  I used metallic red foil to die cut the title and then cut it in vellum to offset over the foil.  I also used a mini paper punch to cut some small hearts.  I think you will agree, it is stunning in its simplicity.
You can find the step by step video HERE.
 
Supplies: Ruby - Metallic Paper Foil (Rinea), love die cutter, die cutting machine, transparency, mini heart paper punch, silver permanent marker, Brilliance Moonlight White Ink Pad (Tsukineko), Red Glitter Sorbet Cardstock / Vellum Glitter Red Spatter / Teen Girl Stickers / Cherry Kisses Archival Seeds / Hearts Dew Drops (The Robin's Nest)


To purchase the Ruby Red foil for this project, visit Rinea.

For more inspiring paper-craft projects from the Design Team, be sure to visit us at the
Rinea Blog and follow us on Facebook.

                                              Thanks for visiting!

Sunday, 19 February 2017

Love Layout Video - The Robin's Nest

Check out my YouTube Video of a quick & easy Valentine's Day layout.  All you need are four photos and bit of vellum & transparency to make this project unique.  I think you will agree it is stunning in its simplicity.

You can find the step by step tutorial HERE.
https://www.youtube.com/watch?v=IA6oFXCaKi4


Robin's Nest Supplies:
Cherry Kisses Archival Seeds, Red Glitter Sorbet Cardstock, Vellum Glitter Red Spatter, Teen Girl Stickers, Hearts Dew Drops, Dew Dew Glue

Other Supplies: love die cutter, die cutting machine, Red Paper Foil (Rinea), transparency, mini heart paper punch, silver permanent marker, Brilliance Moonlight White Ink Pad (Tsukineko)

You can find all of these lovely supplies at The Robin's Nest.

For more inspiring paper-craft projects from the Design Team, be sure to visit us at The Chattering Robin's Blog and follow us on Facebook.

Thanks for visiting!

Sunday, 15 January 2017

Snowman Card - The Robin's Nest

Today I am sharing a video tutorial about creating a card using The Robin's Nest Winter Retreat Glitter Swirl Cardstock & snowflake embellishments.  The color pallet includes aqua blue with tan & chocolate brown with delicate flourish designs. I used Archival Seeds to embellish the card and they were just the perfect finishing touch. They are made of paper and therefore, they are very light and have a matte finish.  Each package contains various size domes; some are solid and some have small prints with a hint of glitter.  Wherever, you like to use bling, buttons, or brads, Archival Seeds are a more subtle and discrete option.  I look forward to using these more often in my projects. 
YouTube Video: HERE


Other Supplies: wooden snowflakes, Stazon White Ink Pad (Tsukineko), card base 5x7"

A Closer Look:

To purchase the supplies needed for this cute snowman card, visit The Robin's Nest

For more inspiring paper-craft projects from the Design Team, be sure to visit us at

Wednesday, 1 June 2016

Enjoy Today - YouTube Video


Hi Robin's Nest Fans,
Follow the link below to watch my newest video, Enjoy Today as I show how to make a vibrant inspirational sign with Robin's Nest products. The striking colors and uplifting message make it the perfect artwork to frame for display and hang in your home.
                                        YouTube Video                   
Here is a little peek..
        
Robin's Nest Supplies: Paisley 6x6" CanvasStock, Passion Pink Glitter Cardstock 8.5 x 11", Ebony Glitter Cardstock, Metallic Gold Dew Drops, Rosy Flower Die CutsRosy Cards, Obsidian Diamond Dew Drops, Black Dew Drops, Dew Dew Glue

Other Supplies: black cardstock, Dry Embossing Stylus Tool, 3D Foam Pads, frame


                   To purchase the supplies for this project, visit The Robin's Nest.

                                  For more paper-craft projects from the Design Team,
                       be sure to visit us at The Chattering Robin's Blog

Wednesday, 4 May 2016

Let's Ride Layout - The Robin's Nest

It's Video Time!  I hope you will watch my latest YouTube video as I create a father & son layout using a surprising amount of Robin's Nest glitter cardstock. Don't miss the useful tip I share that helps when cutting thin & fragile shapes by hand. My leather jacket wearing nephew is too cute to miss.

 
Robin's Nest Supplies:
Flame Card Collection, Flame Sticker, Almost Black Glitter Cardstock, Silver Glitter Cardstock, Red Glitter Letter Stickers, Silver Bells Round Dew Drops, Heart Dew Drops, Dew Dew Glue, Rusty Rose Straw

To purchase these supplies, visit The Robin's Nest.


For more paper-craft projects from the Design Team,
be sure to visit us at 

Wednesday, 6 April 2016

New Arrival Baby Card - Robin's Nest

Dew Drops are my favorite product by The Robin's Nest. I can use them to embellish every project, card, or layout that I make. Here I have transformed Round Dew Drops into spectacular glittering bubbles for my new arrival card featuring a baby in the bathtub. Watch my video below to learn how easily I achieved this beautiful affect.

  •   The Robin's Nest Supplies
Other Supplies: Bundle of Joy clear stamp set (Echo Park - Hampton Art), Diamond Stickles Glitter Glue (Ranger), Baby Bathtub Die Cut (Sizzix), white gel pen (Sakura), chalk (Inkadinkado), VersaMark Ink (Tsukineko), 2.5" circle punch (Marvy Uchida), 3" scallop circle punch (Marvy Uchida), clear mounting block, white & blue card stock, 6x6" card base

Directions:
1. Background - Stamp a small design onto the spotty pattern paper using VersaMark Ink. Using a cotton ball lightly apply chalk over the image. Pat gently...don't rub.  Stamp additional images onto white card stock, color, and punch. Attach the decorated card stock to the card base.  Lastly, use a white gel pen to add faux stitching details around the edge of the card base.

2. Main Image - Die cut the baby in the bathtub onto white cardstock. Use chalk to color it using a cotton swab.  Use a paper punch to cut a 2.5" circle & 3" scallop edge circle.  Adhere the baby to the center of the circular mattes using foam tape. Add the duck embellishments and use a white gel pen to add faux stitching details around the edge of the circular matte.

3.  Dew Drops - Select blue, white, & clear Dew Drops in a variety of sizes.  Press each Dew Drop into a piece of re-positionable putty so they will be temporarily secure.  Apply Stickles Glitter Glue onto each Dew Drop and set aside to dry. When they are dry, gently peel them from the putty and adhere them to the card.
 

 A Closer Look:

 
Look at those pink cheeks!
          
        
 Add dimension by shading with grey chalk!
glittering bubbles!
  
faux stitching details!

Don't forget the finishing touch...a coordinating envelope.
I think you too will find Dew Drops are the perfect accent for any project.

Watch the video HERE.

Thursday, 3 March 2016

"Hello Friend" Easel Card - Robin's Nest

Here is my Spring/Easter card for the Robin's Nest DT. It is a unique card with an easel front but is very simple to create.
To learn how to make a forward fold easel card, you can watch the video HERE.
PS I also share 4 extra cards at the end using the same Robin's Nest papers and products

The Robin's Nest Supplies:

For these products and many others visit... www.shop.robinsnest-scrap.net

Other Supplies:


Other Supplies: N'wood Bird clear stamp (Trimcraft), gel pens (Sakura), Archival Black Ink (Ranger), Distress Ink (Ranger), Scallop Border Edge Punch (EK Success), Zig Water Brush (EK Success), mounting block, watercolor paints, flower brads, card base, scoring board, paper creasing tool, ruler, pencil

How to make a Forward Fold Easel Card:
1. Measure the card base and divide the front panel in half. (parallel to the fold) Use a ruler and lightly mark the center with a pencil line. Place the open card onto the scoring board and use a paper creasing tool to score the line. Place the edge of the ruler along the scored line to help the paper bend easier. Then place the card on a flat surface and firmly crease the card with a paper creasing tool.

2. Place the card into landscape position and attach double sided tape to the lower half section of the card. The open side will have tape but the folded edge side will not. Adhere a piece of pattern paper to cover the entire front but only attach it to the lower half of the card front. The upper half of the pattern paper will not be attached to the card base so that the fold in the card base can act as a hinge and the card can stand up to be displayed like an easel. Lastly, turn over the card and trim away any excess overhanging paper.

3. Embellish the front of the card as desired.

4. Select coordinating paper to match the front of the card and adhere it to the inside of the card. It will show when the card is standing. TIP: If the pattern paper has a bold design, do not cover the entire inside of the card. Leave 2-3 inches at the top of the inside of the card uncovered so that you may easily sign a message.

5. Next, select coordinating brads. So that the card front has a place to rest against and stand as an easel card, attach brads to the inside of the card in a row 3-4 inches from the bottom edge of the card. Varying the distance from the edge of the card will change the angle of the easel card. When you are satisfied, mark the placement of the brads with a pencil and use a craft knife to make small slits for the brads. Finally, push the brads through the slits and secure them. For a neat finish, cover the back of the card with additional paper to hide the open legs of the brads.

A Closer Look:


                                               YouTube Video - HERE


Wednesday, 3 February 2016

Live Every Moment Layout - YouTube Video

In this video, Live Every Moment, I show how to create a nature inspired family layout using a limited color palette that really let the photos shine and take center stage.  You won't want to miss the scrapbooking tip that can help you "stretch your stash."


Robin's Nest Supplies: 12" Mocha Daisy Glitter Cardstock, 12" Lodge Cutouts & Striped Cardstock, Iridescent Glitter Cardstock, Dew Drops, Dew Dew Glue Adhesive Spots

Other Supplies:
 4 photos (4x5"), Birds & Live Laugh Love Cork'd Stickers (Paper House), Floral Snapshots Stickers (Paper House), bird paper clip (Prima), wooden doillie (Recollections), fabric flowers & burlap leaves (Recollections), brads, dragonfly mini paper punch
YouTube Video: Live Every Moment
Visit 
The Robin's Nest to see
all their unique embellishments.

Thanks for visiting!

Sunday, 10 January 2016

Almost One Layout - YouTube Video

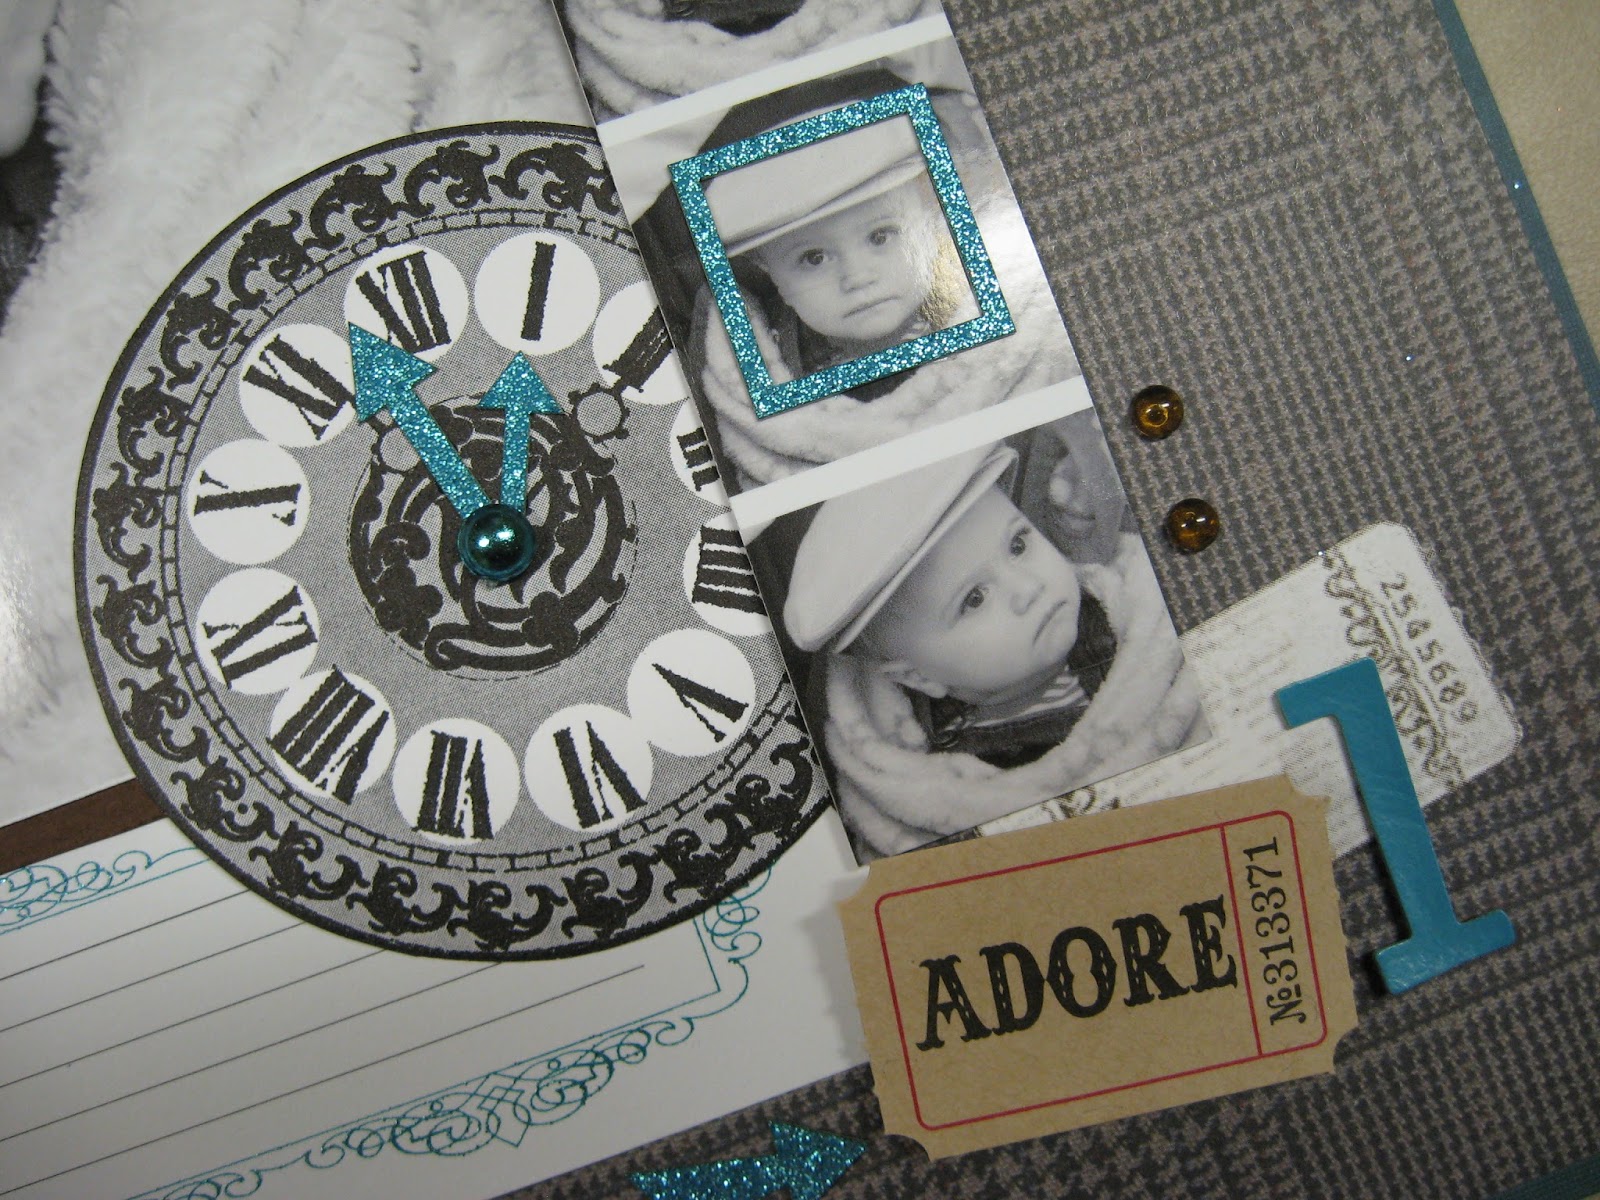
Here is a sneak peek of my first project for Robin's Nest. You can check out the VIDEO for a step-by-step look at how I created it. I also share a great tip for how to have perfect title placement that avoids frustration & disappointment. 


A Closer Look: 


Robin's Nest Supplies: Mens Plaid Cardstock, Black & White Clock CardstockOriginal Ribbon, Dew Drops, Dew Dew Glue, Lodge Cutout Cardstock, Teal Glitter Arrow Chipboard Embellishments, Teal Glitter Journaling Blocks

Other Supplies:
cardstock (teal, brown)
embellishments - clock, ticket, chipboard letters

Visit The Robin's Nest to see all their fabulous products.