Wednesday 28 October 2015

Halloween Card - Spooky Spider Star


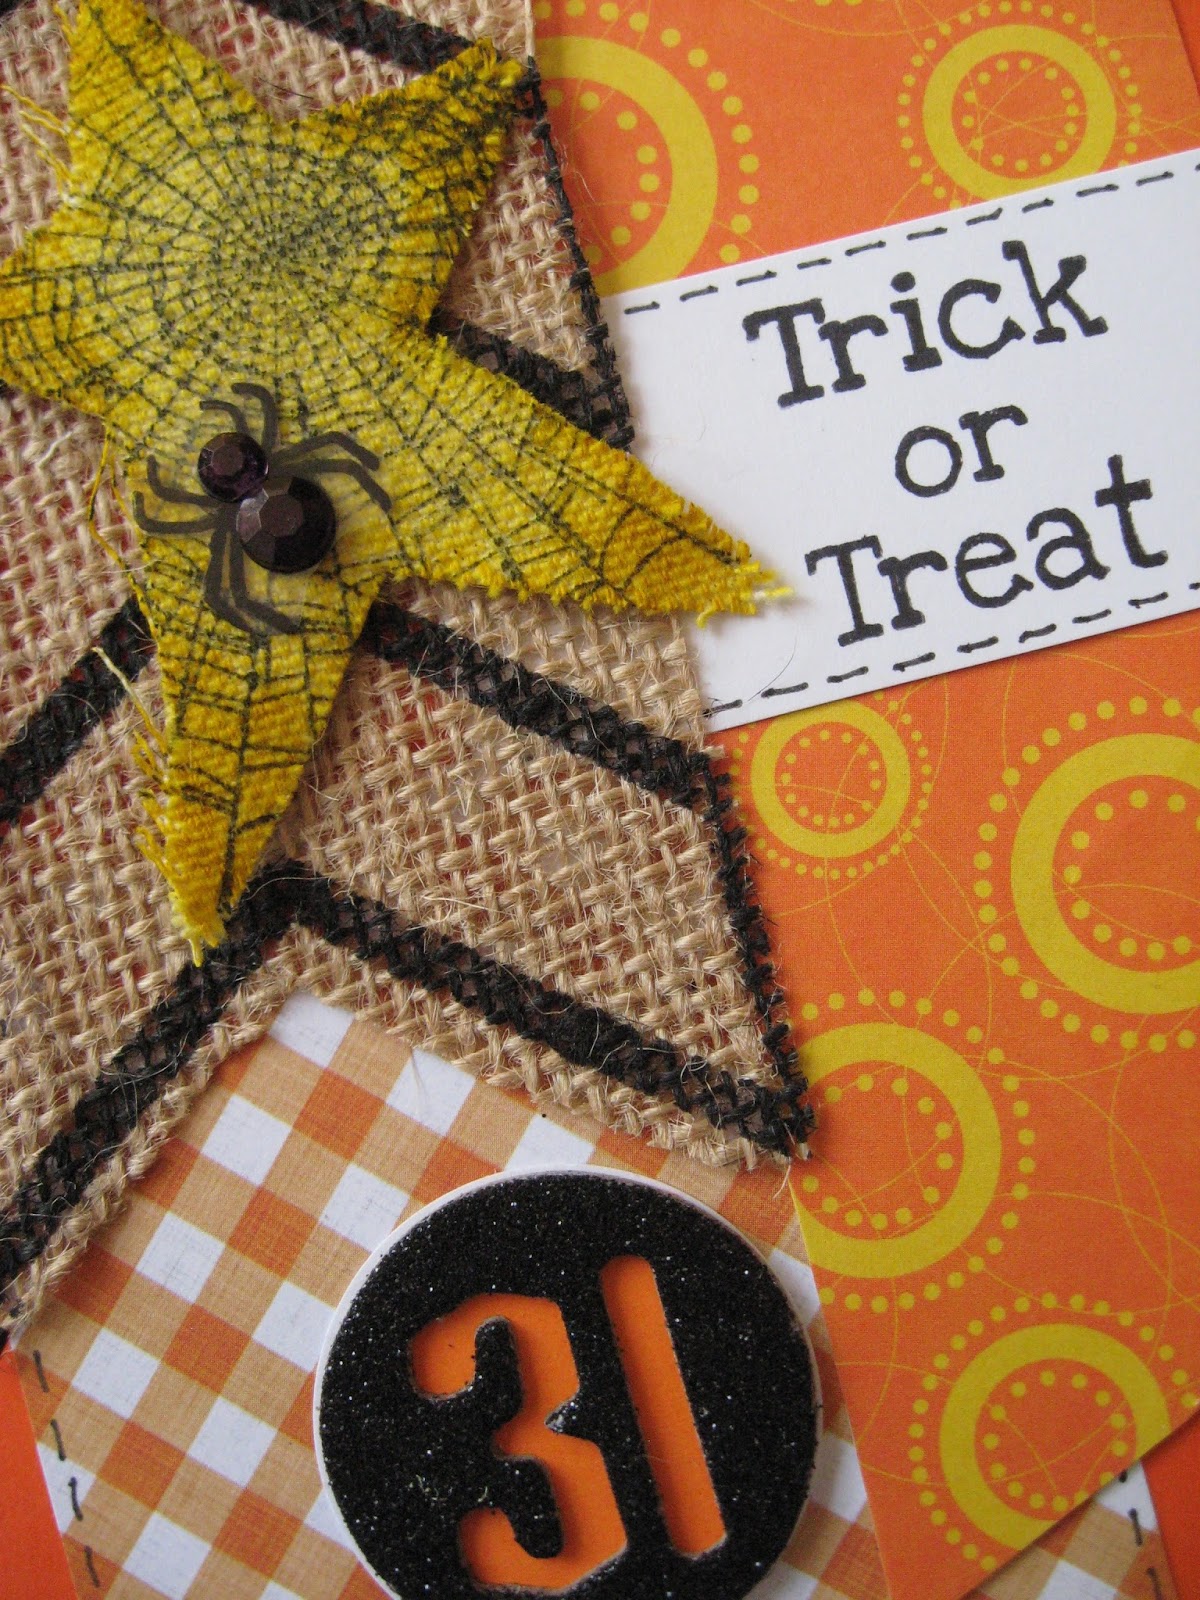
It is almost Halloween but it is not too late to make this cute card.
Directions:
1. Use a sponge applicator to apply ink to a large canvas star. (Mustard Seed Distress Ink) Apply ink from the edges working in towards the center of star so that the color is darker along the edges. Set aside to dry or dry with a heat gun. Use permanent black ink to stamp a cobweb design over the canvas star.

2. Cut a banner shaped flag from a piece of burlap fabric. (2" x 4") Cut two banner shaped flags from pattern paper. (2"x 5" & 2.5"x4") Cluster the banner flags overlapping them slightly and attach them to the card using double sided tape.

3. Next, stamp a spider on a piece of transparency using permanent black ink. After the image has dried, carefully cut around it and add attach two black gems for the body and head. Glue the gem spider to the canvas star and attach it to the top left side of the card.

4. Finally, embellish the card with a sentiment, glittered chipboard number, and faux stitching details. Draw stitches with a fine tip black pen around the edge of the flag on the left, as well as, along the top and bottom edge of the sentiment.

A Closer Look:
 
Supplies: canvas star (Linnie Blooms), burlap printed fabric (Linnie Blooms), Little Man 8" paper pad (Paper House), Distress Ink (Ranger: Mustard Seed), StazOn black ink (Tsukineko), spider web clear stamp (Inkadinkado), sponge ink applicator, gems, liquid glue (Aleene's Tacky Glue), chipboard number, black glitter, transparency, white cardstock, black fine tip pen, card base 5"x7"

Browse the Linnie Blooms Shop: HERE
Visit the Linnie Blooms Blog to see more inspiring projects
and follow us on Facebook.
Don't forget to visit Karen at Art & Soul.

Tuesday 27 October 2015

Pagemaps - Sketch Challenge Reveal

So, what is Pagemaps?
Pagemaps is a free online sketch resource for both scrapbookers & cardmakers.


Pagemaps October Sketch:

A Closer Look:


Directions:
1. Use 8-10 coordinating patterned papers to create various mattings and border strips. Cut a matte for the central photo and offset it to the right side. Use a wooden Polaroid to frame a smaller photo. Punch a photo with a 2" circle punch and add a frame.

2. Use a craft knife to cut around the point of an arrow on the background paper and slide the main photo slightly underneath it. Cut around various size circles from pattern paper. Add an epoxy dome sticker over some of the circles.

3. Stamp the owl design onto 3 different styles of pattern papers. Cut out the owls and reassemble them with different color wings. Use gel pens to color their eyes white, as well as, to add details to the owls.

4. Next, use a craft knife to cut out one of the word banners from the 3x4" quote card. Attach it to its original place using foam tape to raise it. Finally, embellish the layout with arrows, circles, and tabs. Add an assortment of fun epoxy sentiments onto the tabs.

Supplies: scrapbook paper - ColorWays Sapphire Bokeh 12 " (Paper House), scrapbook paper - ColorWays Sapphire Trim Cards 12 " (Paper House), scrapbook paper - ColorWays Sapphire Edgings12 " (Paper House), scrapbook paper - Out of Print 12" (Basic Grey), Dad Tags 12" Scrapbook Paper (Paper House), 8" paper pad Little Man (Paper House), epoxy embellishments (Heidi Grace), Our Big Adventure cardstock stickers (Paper House), epoxy embellishments (Heidi Grace), wooden veneer frame, owl rubber stamp (Hampton Arts -Who You Lookin' At- PS0412A), Archival black ink (Ranger)

                                  Visit: www.Pagemaps.com

Wednesday 21 October 2015

Craft Ideas Magazine (Holiday 2015)

You don't want to miss the new issue of Craft Ideas Magazine - Holiday 2015.  It is packed full of inspiration for your home decorating, hand-made gift ideas, Christmas ornaments, clever packaging tips gift wrapping, & seasonal card making.  I had two Christmas cards selected for this issue.
 Visit Craft Ideas Magazine for projects, tutorials, giveaways, & subscriptions.


Saturday 17 October 2015

Halloween Gift Bag & More!

           
A decorative gift bag is a simple and fast project that is a perfect family activity. It is an inexpensive and non-messy craft to enjoy together with your children. Stickers are an great alternative to cutting & gluing and allow even young children to participate. Give them as a Halloween party favour bag or simply use them for Trick-or-Treating.

A Closer Look:

Directions:
1.
Attach patterned background paper to the gift bag. Tear a strip of black cardstock and attach it to the bottom edge as a horizon for the scene. Trim away any excess overhanging paper.

2. Punch a row of zig zag border on a strip of black cardstock. Attach the border along the top edge of the gift bag.

3. Arrange the spooky scene using the puffy stickers & die cuts. Select the moon, pumpkin, bats, tree etc. Finally, embellish the gift bag with a Halloween greeting.

Supplies: ColorWays Noir Trimmings 12" scrapbook paper (Paper House), Halloween Die Cut Pack (Paper House), Spooky Halloween Puffy Stickers (Paper House), black cardstock, gift bag

TIP: Decorative gift bags can be made for any occasion or holiday with just a few simple supplies. Perfectly personalize them for the recipient using their favorite colors.


These little skeleton stickers are already posed for dancing!

Skeleton Couple Disco Dancing Card
Supplies: ColorWays Noir Bicycle & Trimmings 12' scrapbook paper (Paper House), High Heels clear stamp set (Hero Arts: CL303), Archival black ink (Ranger), bracket punch (Martha Stewart), silver mirror board, button, gems, ribbon

TIP: In order to plan the sticker scene, I recommend cutting the puffy stickers apart while they remain on the clear backing sheet. This allows you to try different placements before committing yourself to sticking them down. Stickers are not forgiving and are difficult to remove without damaging the paper. Save yourself the headache and keep them on the transparency until you are absolutely satisfied with the design.
               Visit Paper House to see their whole fun range of Puffy Stickers

Wednesday 14 October 2015

Altered Clothes Pins

I saw these cute little canvas leaves and was inspired to make some autumnal themed clothes pins.  I plan to use them to decorate my kitchen by clipping them on the lamp or curtains to add a hint of "fall".  I might even add a magnet to the back of one and use it on the refrigerator to hold notes.  Here's a step by step of how I did it.


TIP: Since I have accumulated many sprays and mists, I make a sample card for each color by spraying a mini tag and attaching it to a jump ring. I write the brand & color on the back of the tag. Then I can quickly find the right colors when I am planning a project. (see photo below)

Directions:
1. Prepare to Paint: Protect your work surface & wear gloves.  Place the canvas leaves on your craft matte or newspaper. Mist the leaves with 3-4 autumnal colors. With your finger, blend the colors together so they absorb into the weave of the fabric. I worked with all paint colors simultaneously. Remember to color the back side of each leaf as well. Set leaves aside to dry.

2. Color Clothes Pins: Attach washi tape to both sides of each wooden clothes pin. Carefully trim away excess tape with scissors and firmly press all edges securely.

3. Assemble Bows: Cut a strip of fabric about 1.25in x 4inches in length. Find the center of the strip. Pinch and twist one side of the fabric to the back and use a piece of wire to cinch the center of the bow twisting the wire to secure it. Trim the ends of the fabric if needed. Tie a small bow using jute or baker's twine.

4. Detail the Leaves:
When the leaves are thoroughly dry, take each leaf and fold it in half to the stem pressing firmly with your fingers.  The stiffened canvas will hold the gentle crease and the fold will appear to be the vein of the leaf giving it a more realistic appearance.

5. Embellish Clothes Pins:
Use a hot glue gun to attach the fabric bow to the end of the wooden clothes pin.  Next, glue a leaf in the center of the fabric bow. Finally, glue a twine bow on the leaf and embellish it with a button.


Browse the Linnie Blooms Shop: HERE

Linnie Blooms Supplies: canvas leaves, wooden clothes pins
Other Supplies: Moon Glow Glimmer Spray, twine, buttons, washi tape, fabric, wire, glue gun

 A Closer Look:
    Visit Linnie Blooms to see more inspiring projects and follow us on Facebook.

Monday 12 October 2015

Little Monster Layout


Today I wanted to share a little Halloween inspiration with a layout of my nephew. Shhhhh, don't tell. I only had one photo and so I printed it in many sizes and cropped it to make it appear I had more shots. I was so pleased that it turned out so bright, fun, and every glorious detail compliments the photo. Even if it's not Halloween, these little monsters are the cutest embellishments especially for pages about your young children. Here's all the details.

Directions:
1. Adhere the two main photos to the 8"paper and then matte it onto black cardstock. Use a shaped paper clip to attach a vertical strip of three mini photos to the upper right.

2. Next, attach two 2" paper stars to transparency and cut around them leaving a .25" boarder of transparency.  Embellish the transparent edge with dots using a black permanent marker. Add a large arrow under the main photo.

3. Use a permanent black marker to add dots and doodling around the edges of three 1.5" photos. Next, matte the three photos with coordinating cardstock and use a scalloped edge square punch to matte the other two small photos. Lastly, adhere the 5 small matted photos underneath the 8" square.

4. Finally, embellish the layout. Adhere Monster Puffy Stickers to the lower edge of the 8" photo square and add a sprinkling of stars, circles, shaped paper clips, buttons, and brads around the layout.

Photo Dimensions:
(1) 4" x 4"
(1) 4" x 5.5"
(3) 2" x 2"
(5) 1.5' x 1.5"

TIP: If you only have a single photo from a memorable day, print it out in different sizes. Also, crop just the face so that you will have a variety of images even though there was only one photo taken.

A Closer Look: 


Supplies:  Little Girl Paper Pad 8" (Paper House), Monsters Puffy Sticker (Paper House), star shaped paper clips, Hocus Pocus 12" scrapbook paper -Doodlebug Design, transparency, scalloped edge square paper punch (Marvy Uchida), permanent black marker, brads, buttons, shapes- stars/arrows/circles

Visit Paper House to see their whole fun range of coordinating Halloween papers & embellishments.

Thanks for visiting!