Tuesday 27 August 2013

Staple It!

I used colored staples to form a chevron border on this cute friendship card. 

Through careful placement of the mini stapler, I was able to build a chevron pattern. After I stapled each pair of chevron sides, I changed the color of staples. Alternating staples was a bit time consuming but I was pleased because it created such a terrific effect.


Take a peek over at the Practical Scrappers Blog to see what the Design Team has been up to using staples.

*FYI – I nearly used the back of the staple with the bent metal ends because it created a pretty pattern.

Friday 23 August 2013

Woo Woooo! (WOOD)


"All Aboard"
the Practical Scrappers Blog Train

Hop aboard this Choo Choo to find lots of great ideas & inspiration using wood.

Welcome to the Practical Scrappers/Paper Secrets Blog Hop!  We are so excited to have you here today!  For this blog hop we are featuring the Ten Things Team from Practical Scrappers and members from the Design Team at Paper Secrets. Our topic for this hop is a fun, trendy one that will definitely catch your attention: wood! We have a collection of wood goodies from Paper Secrets to give away and you can get all the details on that below, but first here's the list for the hop!

Blog Hop List
Karen Sessions (you are here!)

Here's what you can win from Paper Secrets!

You can do any or all of the following to get entered:
1) Be a follower here at Practical Scrappers
2) Be a follower at the Paper Secrets Blog
5) Leave us a comment here telling us which of those you did :)

You have until 11:59 PM CST on Sunday, August 25th to enter.
A winner will be announced early next week!

 Do stop by and visit all the ladies blogs and gather some great ideas along the way.
If you get lost, return to Practical Scrappers to rejoin the Blog Train.

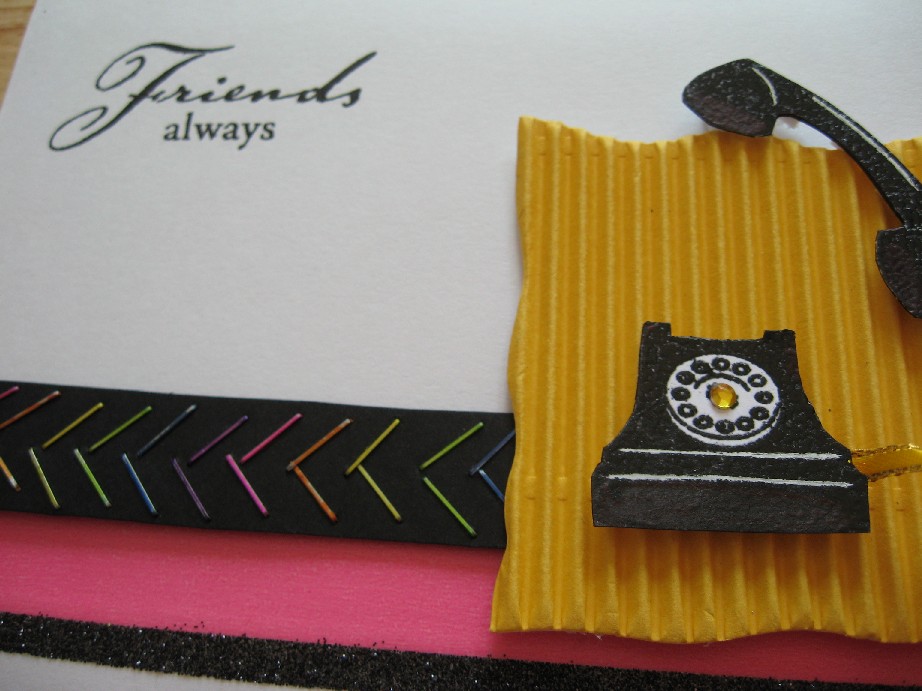
For my layout, I used colored wooden matchsticks which are most likely recognized as a kid's craft. They are thin enough so they won't add too much depth to your projects and “wood” easily work well on cards. Once I noticed I had all the colors of the rainbow, my project for a rainbow theme took off. I knew gluing individual matchsticks would be fiddly & time consuming so after I placed them in the order I wanted, I simple put a strip of double sided tape down to hold them all together. I assembled about 2 inches of matchsticks at a time and found them quite easy to work with once glued together.  I carried our “wood” theme to the extreme by embossing the background paper with woodgrain as well as using a woodgrain alphabet for the title. I hope I have inspired you to try something new with wood and maybe even raid your kid’s craft stash. Your next stop on the Blog Hop is Kelly Holfield.

Here are some close ups of my project.


Your next stop on the Blog Hop is Kelly Holfield
Thanks for stopping by.

Thursday 22 August 2013

"Wood" You Join Me?

Practical Scrappers Design Team has a special Blog Train planned for August 23-25.
  All the projects will feature wood.  Make sure not to miss one stop.


Tuesday 20 August 2013

The "Eyes" Have It

Today's topic: Eyelets. When I think of using eyelets it is primarily for the hole at the top of a tag or put in a row with the intention of lacing ribbon through them. For my layout I simply used them as an embellishment in place of a rhinestone or brad. I used yellow eyelets as centers for the orange daisy flowers as well as a couple scattered along the edge. Visit Practical Scrappers to find other fun things you can do with eyelets.

Tuesday 13 August 2013

Smear, Smudge, Splatter...

It’s time to get MESSY and create a cool new background. 

I used Vaseline to serve as a resist which I applied directly to the background paper. The Vaseline acts to seal the original paper by protecting the pattern from the paint. My original patterned paper was maroon with lime green vine design. I decided what area of the paper I wanted to remain true and then used my finger to apply the Vaseline Next, I applied yellow acrylic paint over the entire background page with a sponge brush. I brushed on the paint using light strokes going over the areas with Vaseline too. After the paint has dried, I used a baby wipe to remove the Vaseline to reveal my new altered background paper. I did not attempt to create a pattern or distinguishable shape when applying the Vaseline. My goal was to create a distressed & peeled paint appearance. I find this technique useful when I have a patterned paper that I don’t really like. If the pattern or color is not to my taste, I can alter it with Vaseline & paint.
Visit Practical Scrappers today to see more tips and tricks with paints. (and don't be afraid to get MESSY!)