Showing posts with label Easter. Show all posts

Monday, 7 March 2022

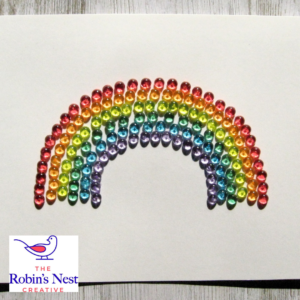
Bright Rainbow Card

Today's project is perfect for spring.  I'm sharing how to make a rainbow card using Dew Drops.  Let's jump in and welcome springtime with this beautiful rainbow. Follow me over to the The Robin's Nest blog HERE for the complete tutorial.


This project is submitted into the following challenges...


Monday, 29 March 2021

Cross Easter Card

Here is a quick and easy card to make for Easter. White on white with a subtle hint of color is very elegant so this design is also suitable to be used as a wedding or sympathy card. For an extra special touch, highlight a special design within the textured pattern using a glitter gel pen.  You can find the step by step instructions HERE.


This card is submitted into the following challenges...
Crafty Creations Challenge #419


Other Supplies:
foam mounting tape
die cutting machine & cross embossing folder


Wednesday, 29 April 2020

Mother's Roses

Don't you just love my little bees?  You can make your own too.  These tear drop shapes are available from The Robin's Nest Shop.  All you need a black permanent marker to add the stripes to the bee's body.

This card is submitted into the following online challenges...

Wednesday, 27 February 2019

Easter Eggs Everywhere - FotoBella Design Team

Sadly, I am sharing my final post for the FotoBella Design Team. I have been extremely blessed to be trusted to create inspiring projects to share with you. Again, I am using the beautiful BoBunny - Cottontail Collection. I think you will love the abundance of eggs and vintage bunny images. Be prepared to enjoy the splendor of spring and all the glorious pastel colors.  You can see three more Easter cards on the FotoBella Blog HERE.
Faux stitching details were added with a white gel pen around the edge of the matte.

This card is submitted into the following challenges...
FotoBella Supplies:
BoBunny Cottontail 6x6 Pad
BoBunny Cottontail Noteworthy 28 Pieces
BoBunny Cottontail I Want It All Collection

Other Supplies:
white gel pen, sentiment stamp, ink pad, ribbon, foam tape


Friday, 22 February 2019

Spring Embossed Cards - FotoBella

Today I am sharing my second project of the month featuring the BoBunny Cottontail Collection. This is the first time I tried using an embossing folder over pattern paper. I selected papers with very small discreet patterns to try this technique. I love how the subtle texture brings extra life and pizazz to the cards. You can see two more card samples featuring BoBunny - Cottontail on the FotoBella Blog HERE.

This card is entered into the following challenges...
Through the Craft Room Door (anything goes)
Simon Says Stamps Wednesday Challenge (no stamps allowed)

Notice the subtle embossed butterflies on the yellow pattern background paper.

FotoBella Supplies:
BoBunny Cottontail 6x6 Pad
BoBunny Cottontail Noteworthy 28 Pieces
BoBunny Cottontail I Want It All Collection
Other Supplies:
card base (6x6"), 3D foam tape, embossing folder, die cutting/embossing machine, leaf vine die, ribbon, liquid adhesive

www.FotoBella.com


Thanks for visiting!

Thursday, 14 February 2019

Vintage Bunny Cards - FotoBella Design Team

I have my first project of the month featuring the BoBunny Cottontail Collection to share today.   The papers and die cuts are so beautifully colored.  Look at the details in the bunny's fur.  Doesn't the bunny look velvety soft?  I have three cards featuring this beautiful bunny image. You can see them all on the FotoBella Blog HERE.
This card is submitted into the following challenges...
FotoBella Supplies:
BoBunny Cottontail Collection Pack 12x12
BoBunny Cottontail Bonus 12x12 Paper Bundle
BoBunny Cottontail 12x12 Coordinating Double Dot Paper Bundle
BoBunny Cottontail 6x6 Pad
BoBunny Cottontail Layered Chipboard 6 Pieces
BoBunny Cottontail Noteworthy 28 Pieces
BoBunny Cottontail Double Dot Think Pink Brads
BoBunny Cottontail I Want It All Collection


Thursday, 3 March 2016

"Hello Friend" Easel Card - Robin's Nest

Here is my Spring/Easter card for the Robin's Nest DT. It is a unique card with an easel front but is very simple to create.
To learn how to make a forward fold easel card, you can watch the video HERE.
PS I also share 4 extra cards at the end using the same Robin's Nest papers and products

The Robin's Nest Supplies:

For these products and many others visit... www.shop.robinsnest-scrap.net

Other Supplies:


Other Supplies: N'wood Bird clear stamp (Trimcraft), gel pens (Sakura), Archival Black Ink (Ranger), Distress Ink (Ranger), Scallop Border Edge Punch (EK Success), Zig Water Brush (EK Success), mounting block, watercolor paints, flower brads, card base, scoring board, paper creasing tool, ruler, pencil

How to make a Forward Fold Easel Card:
1. Measure the card base and divide the front panel in half. (parallel to the fold) Use a ruler and lightly mark the center with a pencil line. Place the open card onto the scoring board and use a paper creasing tool to score the line. Place the edge of the ruler along the scored line to help the paper bend easier. Then place the card on a flat surface and firmly crease the card with a paper creasing tool.

2. Place the card into landscape position and attach double sided tape to the lower half section of the card. The open side will have tape but the folded edge side will not. Adhere a piece of pattern paper to cover the entire front but only attach it to the lower half of the card front. The upper half of the pattern paper will not be attached to the card base so that the fold in the card base can act as a hinge and the card can stand up to be displayed like an easel. Lastly, turn over the card and trim away any excess overhanging paper.

3. Embellish the front of the card as desired.

4. Select coordinating paper to match the front of the card and adhere it to the inside of the card. It will show when the card is standing. TIP: If the pattern paper has a bold design, do not cover the entire inside of the card. Leave 2-3 inches at the top of the inside of the card uncovered so that you may easily sign a message.

5. Next, select coordinating brads. So that the card front has a place to rest against and stand as an easel card, attach brads to the inside of the card in a row 3-4 inches from the bottom edge of the card. Varying the distance from the edge of the card will change the angle of the easel card. When you are satisfied, mark the placement of the brads with a pencil and use a craft knife to make small slits for the brads. Finally, push the brads through the slits and secure them. For a neat finish, cover the back of the card with additional paper to hide the open legs of the brads.

A Closer Look:


                                               YouTube Video - HERE