Sunday, 19 March 2017

Vellum Wedding Card Video - The Robin's Nest

Today I'm sharing an elegant wedding card using The Robin's Nest Glitter Swirl Vellum and lovely pearl white Dew Drops. This design is also perfect to celebrate anniversaries. I have made a short instructional video to guide you through the steps.
You can see the video HERE.

The Robin's Nest Supplies:

Iridescent Classic Glitter Swirl Vellum, White Pearl Dew Drops, Dew Dew Glue
Other Supplies: white cardstock, cardbase 6x6", vine edge die, script love die, die cutting machine, Silver Paper Foil (Rinea)

To purchase the beautiful vellum for this card, visit The Robin's Nest.
For more inspiring paper-craft projects from the Design Team, be sure to visit us at The Chattering Robin's Blog and follow us on Facebook.

Thanks for visiting!

Sunday, 5 March 2017

Baby Bird Springtime Birthday Card - The Robin's Nest

It's Sneak Peek Time!!!
Today on the Chattering Robin's Blog you will find my step by step tutorial to create this sweet springtime card.  The yellow Dew Drops are the perfect finishing touch for the flowers and really help bring the card to life.
You can find my tutorial HERE.

www.shop.robinsnest-scrap.net

Other Supplies: pink & white cardstock, bracket die, clear mounting block, N'wood Bird Clear Stamp (Trimcraft), Jet Black Archival Ink Pad (Ranger), H20 Waterbrush (Kuretake), watercolor paints, Scallop Edge Paper Punch (EKsucess), paper flowers, sentiment sticker (Anita's)
 
To purchase the lovely spring papers & embellishments, visit The Robin's Nest.
 
For more inspiring paper-craft projects from the Design Team, be sure to visit us at
The Chattering Robin's Blog and follow us on Facebook.

Thanks for visiting!

Friday, 3 March 2017

Embossed Rinea Paper Foil Card Backgrounds


I just love embossed papers and I use them all the time in my crafting. The subtle textures add wonderful layers. I couldn't wait to try Rinea Paper Foil because I knew it would be just beautiful when embossed. Once I started embossing, I couldn't stop and now I have a nice selection of embossed foils ready to go. Make sure you look for my post later this month when I share a scrapbook layout featuring elegant gold embossed foil.  Here are the girlie cards I made with Rinea's Blush Foil.


Once I started embossing, I couldn't stop and now I have a nice selection of embossed foils ready to go.  Make sure you look for my post next week when I share a scrapbook layout featuring elegant gold embossed foil.

Card 1: Fabulous Flourish & Fairy Birthday Card

Directions:
1. Place a piece of foil into the embossing folder and send it through the die cutter.
2. Embellish the background with mini gems. Use a permanent white marker to highlight parts of the pattern. Stamp a border onto transparency and attach it over the embossed foil.
3. Attach the embossed foil to the card base and cut off any excess overhanging foil.
4. Stamp a central focus image. Color, fussy cut, and mount with foam tape.  Add a sentiment.

TIP: Apply glitter glue in the recessed areas to add contrast within the embossed pattern.

Card 2: Fabulous Fashion Birthday Card 


Supplies: Crafters Glossy Pack: Rinea Paper-Foil 10-Pack 15cm x 25cm (Blush)

Other Supplies: double sided tape, Butterfly Corner Embossing Folder (Darice), Vine Embossing Folder (Darice), die cutting machine, mini gems, tulle, sentiment sticker, transparency, Black Permanent Ink pad, Fairy Stamp, Lace Border Stamp, High Heels Stamp, Dress Stamp, pink cardstock, double sided tape, card base 6x6"

Paper Foil is available from Rinea.

For more inspiring paper-craft projects from the Design Team, be sure to visit us at the Rinea Blog and follow us on Facebook.

Sunday, 26 February 2017

Start Again Card - Sin City Stamps

Hi Girls,
Today I have a vintage style friendship card.   I created the background with layers of overlapping masking tape which adds a beautiful subtle wrinkly texture. The paints accentuate all the crevices and is a very effective way to create an aged look so it is very versatile for any vintage & distressed project. I hope you will try this simple technique to create a textured  background because I'm sure you will love it too.

You can find the tutorial today on the Sin City Stamps Blog.  HERE

Supplies:
1. Birds Clocks Rubber Stamp Set
2. Flower Bird Sketches Stamp Set
3. Inhale Exhale Art Stamp Set
4. white cardstock
5. black ink pad
6. masking tape
7. sponge applicator
8. paint - yellow
9. white crackle paint
10. gold mist
11. liquid adhesive
12. gold micro beads
13. gold brads


To purchase these beautiful stamps, visit Sin City Stamps.

For more inspiring paper-craft projects from the Design Team, be sure to visit us at
the Sin City Blog and follow us on Facebook.

Thanks for visiting!

Saturday, 25 February 2017

Simon Says Wednesday Challenge - Grateful Heart Card

This weeks theme for Simon Says Wednesday Challenge is "Anything Goes" so the possibilities are limitless.  I found myself playing catch-up because I still feel like celebrating Valentine's Day.  Here is my card Grateful Heart.

A Closer Look:
As always Simon Says Stamps will be giving away $50 voucher for the fabulous 
Simon Says Stamp Store


The complete set of rules can be found HERE.

Friday, 24 February 2017

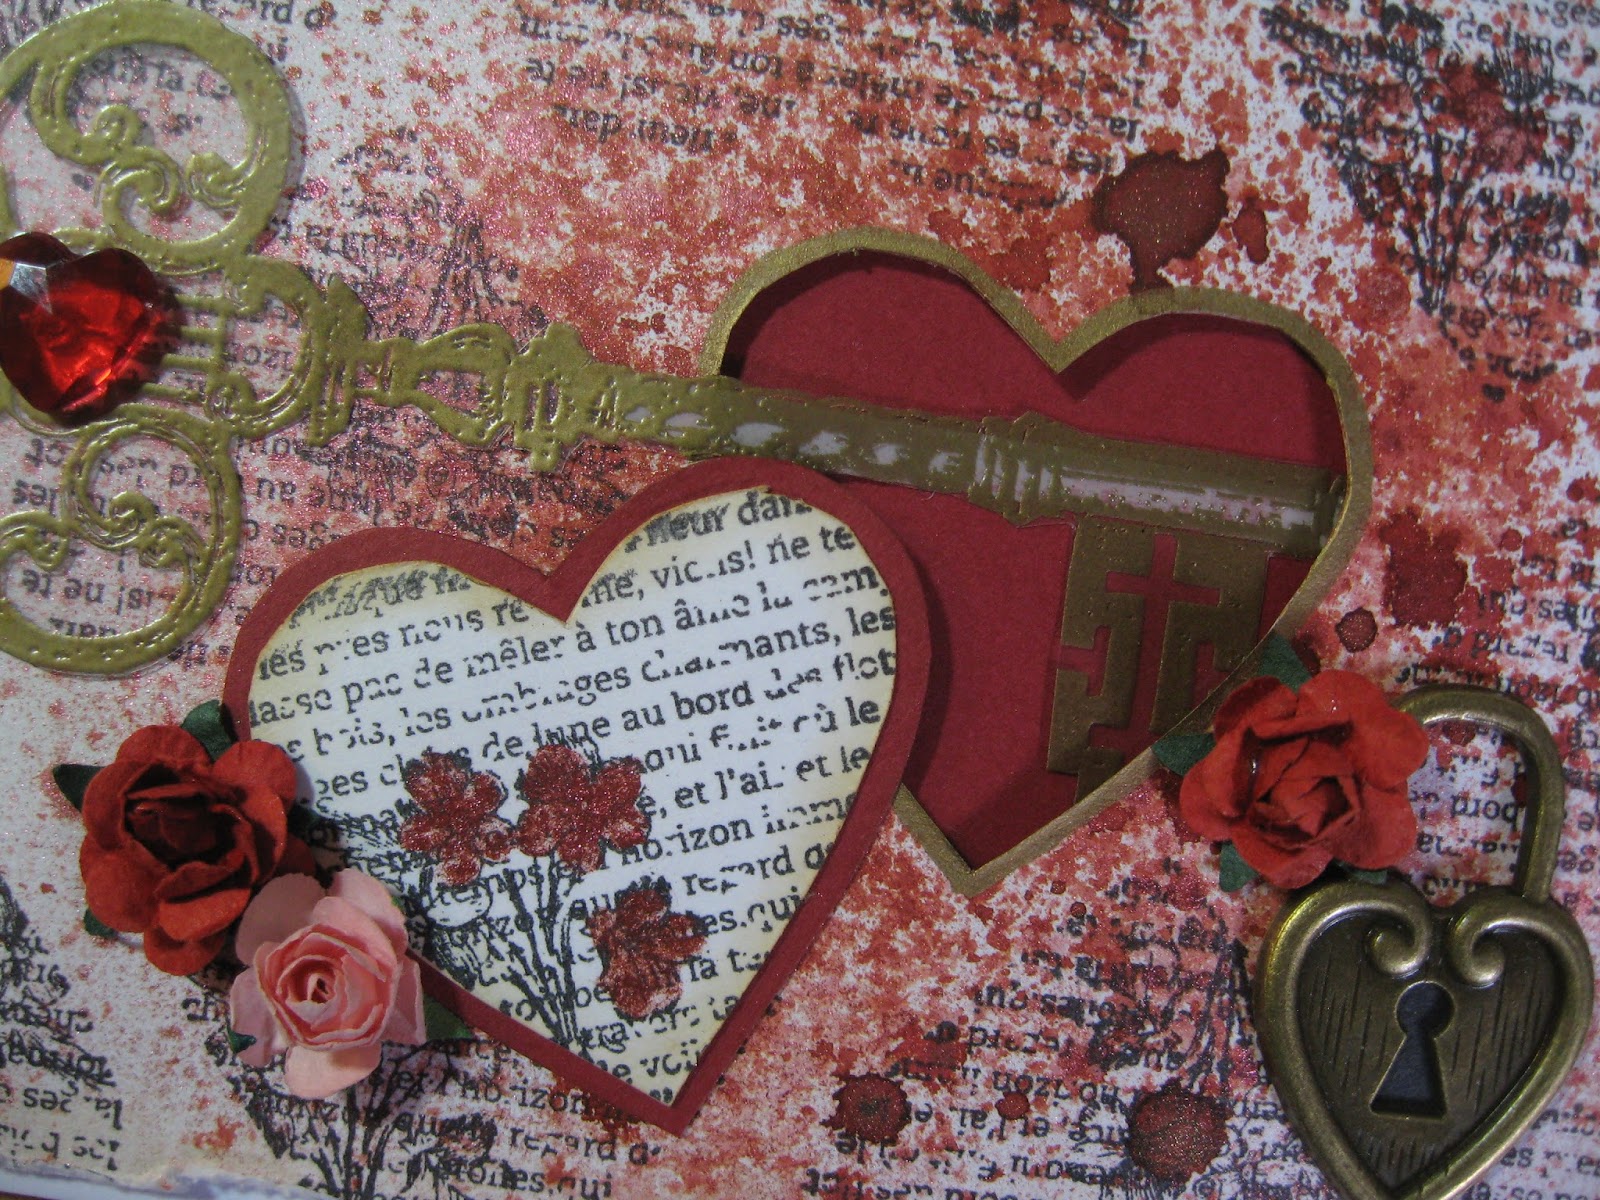
Lindy's Stamp Gang - February Challenge - Love Unlocks My Heart

Lindy's Stamp Gang February Color Challenge
You can find all the rules HERE.
Today I'm sharing my Valentine's card inspired by Lindy's Color Challenge. I used two of Lindy's beautiful starburst sprays to splatter the lower right corner. Here is my card called Love Unlocks My Heart.
Lindy's Stamp Gang Supplies:
Starburst Spray - Peony Scarlet Red

Starburst Spray - Autumn Maple Crimson


A Closer Look:

To be eligible to win, create a project inspired from the February inspiration board above using a minimum of two Lindy’s products. Then make a blog post sharing your project. Make sure to include links to Lindy's Challenge and also links to the specific products you used.
Good Luck!

Thursday, 23 February 2017

Rinea Foil Scrapbooking Title


Check out my YouTube Video of a quick & easy Valentine's Day layout.  All you need are four photos and bit of vellum, transparency, and Ruby Foil to make this project so unique. Rinea paper foils die cut beautifully.  I used metallic red foil to die cut the title and then cut it in vellum to offset over the foil.  I also used a mini paper punch to cut some small hearts.  I think you will agree, it is stunning in its simplicity.
You can find the step by step video HERE.
 
Supplies: Ruby - Metallic Paper Foil (Rinea), love die cutter, die cutting machine, transparency, mini heart paper punch, silver permanent marker, Brilliance Moonlight White Ink Pad (Tsukineko), Red Glitter Sorbet Cardstock / Vellum Glitter Red Spatter / Teen Girl Stickers / Cherry Kisses Archival Seeds / Hearts Dew Drops (The Robin's Nest)


To purchase the Ruby Red foil for this project, visit Rinea.

For more inspiring paper-craft projects from the Design Team, be sure to visit us at the
Rinea Blog and follow us on Facebook.

                                              Thanks for visiting!